
You don’t need a bunker—or a garage full of gear—to feel confident about your family’s water.
Most families start with good intentions: a few bottled cases from the grocery store, maybe a filter pitcher, maybe a “we’ll figure it out” plan. Then life gets busy. The water stash slowly disappears, the pitcher filter expires, and the whole topic becomes one more half-finished project.
This is exactly why Family Prepping, Made Easy: The Beginner Water Setup That Covers You Without a Garage Full of Gear matters. The goal isn’t to become an expert overnight. It’s to build a simple water setup you can actually maintain.
Simple beats complicated.
In this guide, you’ll learn:
- A beginner-friendly framework for thinking about emergency water (without overwhelm)
- A step-by-step plan to set up water storage and water treatment the calm, practical way
- The real-world options (and who each approach fits)
Next: let’s get grounded in why this feels confusing in the first place—and how to simplify it fast.
Quick Reality Check
Family water preparedness is one of those topics that gets weirdly complicated online. People either treat it like a casual weekend errand… or like a specialized hobby requiring shelves of equipment.
Meanwhile, real households deal with real constraints: space, time, budgets, and the fact that you still have to cook dinner, work, and get kids to bed.
A few common situations:
- You have some water, but no plan for what happens when it runs out
- You’re not sure what’s “safe enough” for drinking vs. cooking vs. brushing teeth
- You want something reliable that doesn’t turn into a constant maintenance chore
You’re not behind—you just need a simple plan.
Next: once you understand the three pieces that matter, everything else becomes optional instead of stressful.
The Core Framework
When you strip the noise away, a family water setup comes down to three parts. Think of it like building a house: you need a foundation, then walls, then upgrades.
What matters most (the key variables)
Before buying anything, you only need clarity on a few basics:
- Your household size (including pets)
- Your space reality (apartment closet vs. basement shelving)
- Your likely scenarios (short disruption, boil-water advisory, longer outage)
- Your comfort level (simple manual steps vs. more automated routines)
The basics (the core actions)
A reliable beginner setup always includes:
- Stored water you can access immediately
- A way to make questionable water safer if stored water runs low
- Containers you can handle and rotate without it becoming a project
The “next layer” (the upgrade people skip)
This is where families often get stuck: they either stop too early or jump too far ahead.
The next layer is:
- A repeatable routine (rotation, refills, reminders)
- A clear workflow (what you do first, second, and third when water is limited)
- A scalable setup (so adding capacity later is easy, not chaotic)
Example #1: If you can’t imagine lugging heavy jugs, don’t build a plan around heavy jugs.
Example #2: If you’re relying on one small pitcher filter, you’re missing the “next layer” backup for longer disruptions.
Next: let’s turn this into a simple, beginner-friendly plan you can complete in an afternoon.
The Step-by-Step Plan
Step 1: Set a “calm baseline” goal for your household
Most overwhelm comes from trying to solve every possible scenario at once. Instead, define your baseline: what you want your family to have on hand without rearranging your life.
Start with the mindset: “We want enough water to avoid panic and buy time.”
Checklist
- Write down the number of people in your household
- Include babies, elderly relatives, and pets
- Note any special needs (formula, medical routines, etc.)
- Decide where water can realistically live (closet, under beds, pantry, laundry room)
- Pick a simple baseline time window (start small if needed)
Do this now: Open a notes app and write: “Who needs water here, and where can we store it?”
Step 2: Build storage that fits your space (not an idealized lifestyle)
Storage is the “boring” part—and it’s also the part that makes everything else easier.
The goal is to avoid two common traps:
- Buying containers that are annoying to move
- Storing water in places that are hard to access when you actually need it
Think: stable, reachable, and realistic.
Checklist
- Choose a storage spot you can reach quickly (no climbing, no moving piles)
- Keep water away from harsh heat if possible
- Use containers you can lift safely (especially for smaller adults/teens)
- Label containers clearly (date filled, “drinking water” vs. “utility water”)
- Keep at least one “grab-and-go” amount for quick use
Do this now: Pick one storage location and commit to it—even if it isn’t perfect.
Step 3: Add a simple treatment “backup lane” for when stored water runs low
Stored water is your first line. But a calm plan has a second line: a way to treat water if you can’t easily get more clean supply.
This is where beginners overcomplicate things—buying random gadgets without a clear process.
Instead, decide:
- What sources you might need to treat (tap during advisories, collected rainwater, etc.)
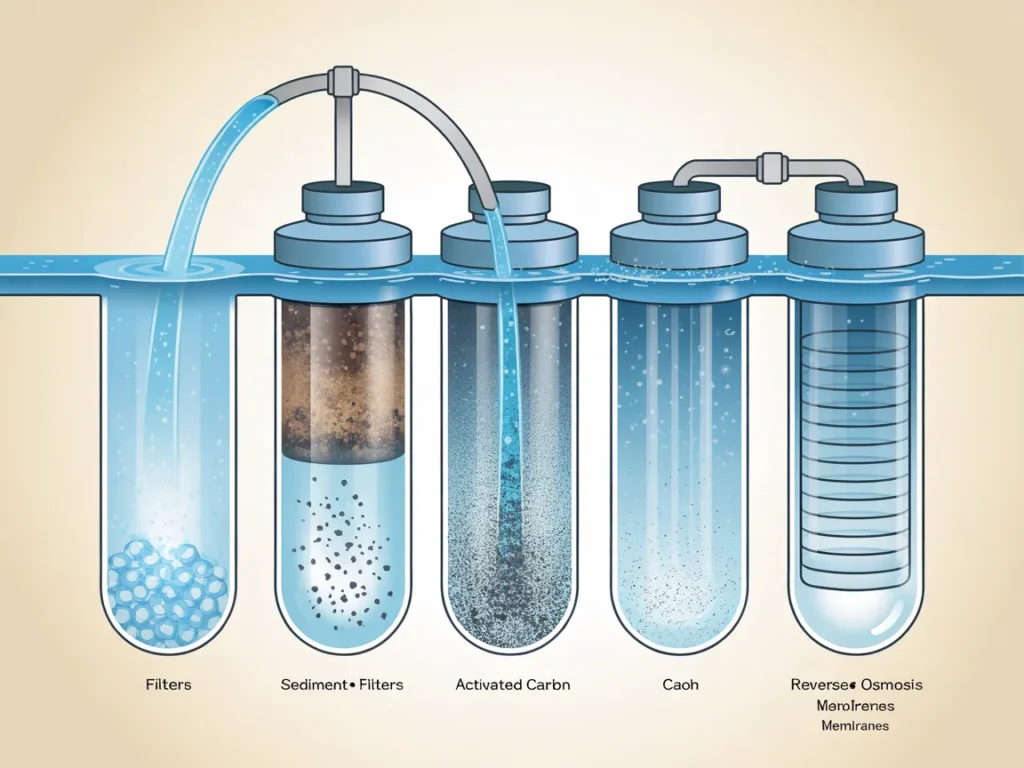
- How you’ll treat it (filtering, purification methods, or a combination)
- How much effort you’re actually willing to do consistently
Checklist
- Identify potential emergency water sources in your area (tap, nearby family, etc.)
- Decide what “safer water” means for your household comfort
- Keep treatment supplies together in one place (not scattered)
- Write a simple instruction note for anyone in the house to follow
- Make sure the plan works even when you’re tired or stressed
Do this now: Write a 2-step rule: “Use stored water first. Treat water second.”
Step 4: Create a household water-use priority list (so you don’t waste it)
When water feels uncertain, families tend to either ration too hard or burn through water too casually.
A priority list keeps things calm and predictable.
For most households, priorities usually look like:
- Drinking
- Cooking/basic food prep
- Hygiene basics
- Cleaning/sanitation
You don’t need to be extreme. You just need to be intentional.
Checklist
- Decide what water is reserved for drinking only
- Pick a cooking approach that uses less water if needed (simple meals)
- Plan hygiene basics (hand washing, teeth brushing)
- Identify tasks you can pause temporarily (laundry, deep cleaning)
- Talk through the plan with your household in normal times
Do this now: Write “Drink > Cook > Hygiene > Clean” on a sticky note and store it with your supplies.
Step 5: Set a rotation routine you can actually keep
This is where “Family Prepping, Made Easy: The Beginner Water Setup That Covers You Without a Garage Full of Gear” becomes real life—not an abandoned project.
Rotation doesn’t need to be complicated. It just needs to exist.
Make it automatic:
- Tie it to a recurring date (first weekend of the month, daylight savings)
- Keep labels simple
- Avoid “mystery containers” you’re scared to open later
Checklist
- Choose a rotation schedule you won’t forget
- Label every container with the fill date
- Use the oldest water first (first-in, first-out)
- Keep a simple reminder in your calendar
- Check supplies and containers for leaks or damage
Do this now: Set one calendar reminder titled “Water check + rotate.”
Next: now that you have a plan, let’s make sure you avoid the mistakes that quietly sabotage most beginner setups.
Common Mistakes
Mistake 1: Buying gear before choosing storage locations
Why it happens: It’s easier to shop than to measure space and make decisions.
Simple fix: Choose your storage spots first, then pick containers that fit those exact spaces.
Mistake 2: Storing water in a place that’s hard to access
Why it happens: People optimize for invisibility instead of usability.
Simple fix: Keep at least one accessible “daily reach” stash where you won’t avoid it.
Mistake 3: Relying on one single method
Why it happens: A single filter/pitcher feels like a complete solution—until it isn’t.
Simple fix: Use a two-lane plan: stored water first, treatment second.
Mistake 4: Making the plan too complicated to maintain
Why it happens: Internet checklists can make you feel like you need an advanced system.
Simple fix: Reduce to a simple baseline you can keep running even during busy weeks.
Mistake 5: Skipping labels and dates
Why it happens: It seems unnecessary… until months pass and everything becomes a guessing game.
Simple fix: Label containers immediately after filling them.
Mistake 6: Not telling the household how it works
Why it happens: One person is “the prep person,” and nobody else knows the plan.
Simple fix: Do a 5-minute walkthrough: where it is, what’s for drinking, and what comes next.
Next: let’s compare the main approaches so you can choose what fits your family, your space, and your comfort level.
Options Comparison
Below are five common approaches families use for an emergency water setup. None are “perfect.” The best choice is the one you’ll actually keep.
Option 1: Bottled water cases only
Best for: Ultra-beginner households who want the fastest start
Pros
- Easy to buy locally
- No setup complexity
- Portable and familiar
Cons
- Bulky to store
- Easy to “borrow” from over time and forget to replace
- Not a long-term plan by itself
Option 2: Large water jugs or water bricks
Best for: Households with a bit more storage space
Pros
- Higher capacity in fewer containers
- More organized than random cases
- Can be stacked in some setups
Cons
- Can get heavy to move
- Requires labeling/rotation discipline
- Not always convenient for small adults or older kids to handle
Option 3: Pitcher-style filters
Best for: Daily convenience and improving taste for normal tap use
Pros
- Familiar and simple
- Useful in everyday life
- Minimal space required
Cons
- Limited capacity at one time
- Requires replacement filters
- Not ideal as the only backup for longer disruptions
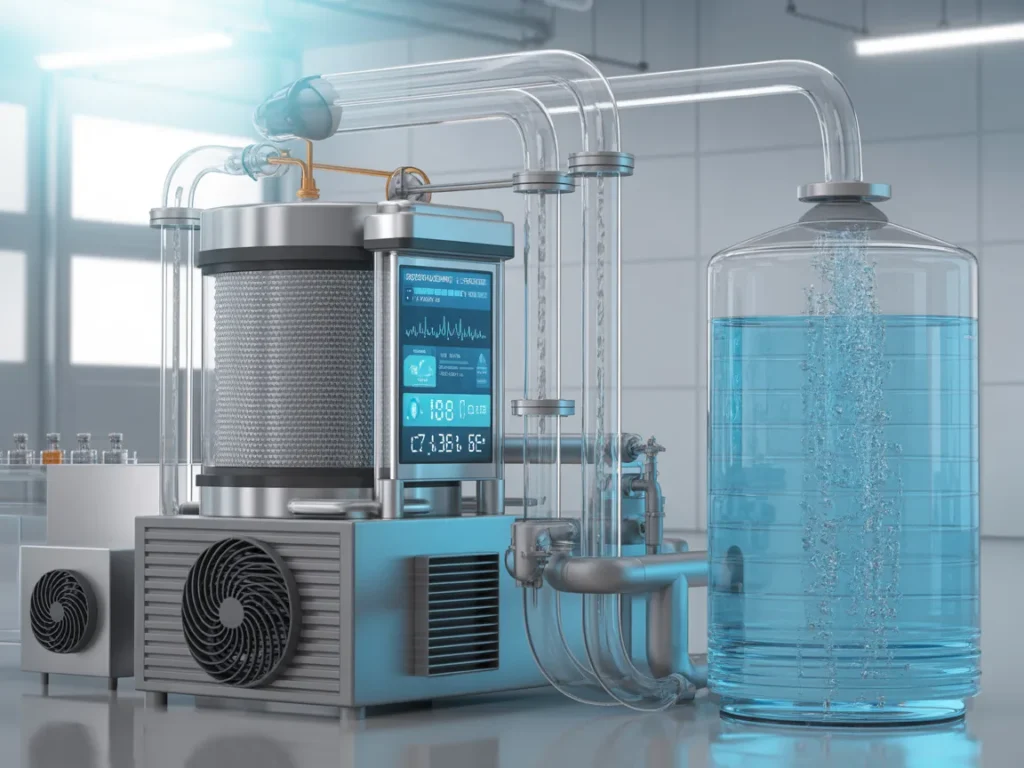
Option 4: Gravity-fed countertop filtration systems
Best for: Families who want higher capacity filtering without plumbing
Pros
- Can process more water than small pitchers
- Works without electricity in many cases
- Can be used at home in one central place
Cons
- Takes counter space
- Needs a consistent routine
- Still requires planning for storage and rotation
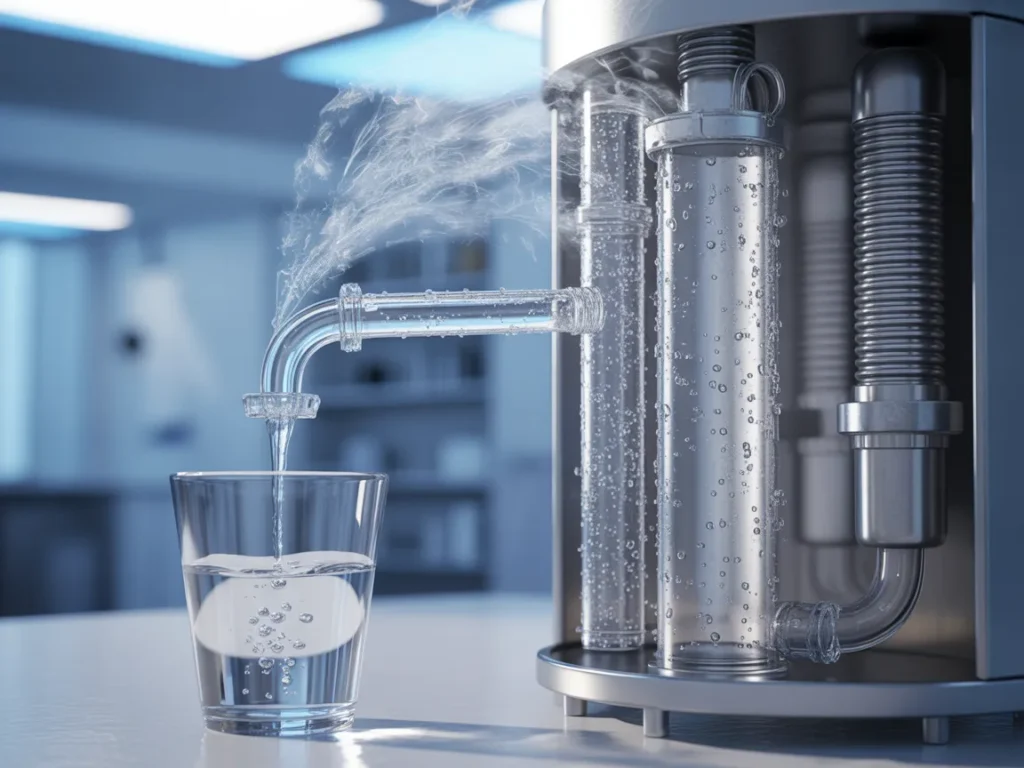
Option 5: A compact “water tower” style system (storage + access-focused)
Best for: Families who want a more organized, household-friendly setup without a garage full of gear
Pros
- Designed around a simple, organized water station concept
- Helps reduce clutter by keeping water in one dedicated setup
- Can be easier to use calmly during an interruption
Cons
- Still requires choosing a location and maintaining a routine
- You’ll want to confirm it fits your available space and needs
- Some families may prefer simpler “grab-and-go” cases only
Which option should you pick?
For Families (busy schedules, multiple people, limited time), prioritize the approach that’s easiest to use and maintain—not the one that looks most impressive online. If space is tight, you’ll do better with fewer, more organized components. If budgets are tight, start with a small baseline and scale later. If you’re not “handy,” choose systems that don’t require complicated installation or constant tweaking.
Next: if you like the idea of a more organized home water station, there’s a presentation worth watching to see how one popular setup works.
Resources
If you’ve been trying to figure out a home-friendly way to store and access water without turning preparedness into a hobby, the Aqua Tower presentation is a helpful next step to review.
It walks through a specific “water tower” style approach so you can see the concept clearly—how it’s meant to be used, what’s included, and how it fits into a beginner setup.
Even if you don’t end up using that exact system, watching a full walkthrough can help you tighten your own plan—especially around organization and day-to-day usability.
You’ll see how it works, what’s included, and whether it fits you.
In the presentation, you’ll see:
- How the Aqua Tower water setup is designed to be used at home as an organized station
- What the system includes and how the overall approach is structured
- How it’s intended to help families avoid a cluttered, piecemeal water stash
FAQ
Fit and space
Will this work if I don’t have a garage or big storage room?
Yes—this whole approach is about being realistic with space. You’ll want to watch the Aqua Tower presentation to see how the “tower” concept is meant to be placed and used in a home.
Beginner readiness
Is this beginner-friendly if I’ve never done “prepping” before?
It’s designed to be approachable. The presentation is useful because it shows the system concept clearly rather than assuming you already know the jargon.
Time and effort
How long does it take to get a basic family water setup in place?
A basic setup can be started quickly if you focus on a simple baseline. The key is choosing a location and a routine you’ll actually keep.
Complexity
Do I need special tools or DIY skills?
Many families prefer water solutions that don’t require complicated installation. Confirm the specifics by watching the Aqua Tower presentation and seeing what’s involved.
Household practicality
What if my kids or partner won’t follow a complicated plan?
That’s why “simple beats complicated” matters. A visible, organized method is often easier for the whole household to understand than scattered supplies.
Maintenance
Do I have to constantly manage filters and parts?
Any water plan benefits from a simple check routine. The presentation will clarify what the Aqua Tower setup includes and what ongoing upkeep looks like.
Budget constraints
Can I start small and build over time?
Yes. Start with a modest baseline, then add capacity or upgrades once your routine is established and stress-free.
Safety
Is this medical or safety advice about water safety?
No—this is general preparedness information. For specific water contamination concerns or local advisories, follow guidance from your local authorities and health agencies.
Next: let’s condense everything into a simple action plan you can follow without overthinking.
Mini Summary + Action Plan
Store a realistic baseline of water where you can actually reach it
Use containers you can lift, label, and rotate without dread
Keep a clear “stored water first, treatment second” backup lane
Put rotation on a calendar so it becomes automatic
Use labels and first-in/first-out so nothing becomes a mystery
Add a simple household priority list so water doesn’t disappear accidentally
Upgrade only after the basics feel easy—organization beats more gear
Family Prepping, Made Easy: The Beginner Water Setup That Covers You Without a Garage Full of Gear works best when you commit to one principle: simple beats complicated—and consistency beats intensity.
Conclusion
If you’ve been wanting a calmer, more practical approach to Family Prepping, Made Easy: The Beginner Water Setup That Covers You Without a Garage Full of Gear, start with the basics: a baseline stash, a simple backup method, and a rotation routine you’ll actually keep.
From there, the “next layer” is about making it easier for your household to follow without you supervising it. That’s what turns preparedness from a stressful project into a quiet kind of relief.
If an organized home water station sounds like it could fit your family, the next logical step is to watch the Aqua Tower presentation and see the full walkthrough for yourself—no pressure, just clarity.
SEE THE FULL PRESENTATION HERE