
The first time most people think about power isn’t when everything’s working—it’s when something small breaks your routine.
A storm knocks out the grid. A heat wave strains local demand. A surprise bill lands in your inbox and you realize you’ve been “reacting” to energy instead of managing it.
If you’ve ever thought, “I just want a simple backup plan” or “I’d love to be less dependent on the grid,” you’re in the right place. This is Take Back Control: A DIY Energy Setup Explained for Beginners—written for normal homeowners and practical beginners, not engineers.
Simple beats complicated. That’s the one idea that makes this whole topic easier.
In this guide, you’ll learn:
- The beginner framework for planning a DIY energy setup without overwhelm
- A step-by-step plan to map your needs, choose safe basics, and build in layers
- How to compare common approaches so you can pick what fits your home and comfort level
Next: a quick reality check that will make you feel a lot less “behind.”
Quick Reality Check
DIY energy and backup power can feel confusing because most advice skips straight to gear lists and technical specs—without helping you define what you’re actually trying to power, for how long, and under what conditions.
That’s why people get stuck in loops like:
- Buying a “solution” first… then realizing it doesn’t match their needs
- Overbuilding (spending time/money) because they’re trying to cover every scenario
- Underbuilding (disappointment) because they guessed instead of planning loads
You’re not behind—you just need a simple plan.
Next: the core framework that makes every other decision clearer.
The Core Framework
When you’re building a DIY energy setup, the goal isn’t to memorize electrical theory. The goal is to make a few decisions in the right order.
Here’s the framework I recommend to beginners:
1) What matters most (key variables)
Before you think “battery,” “solar,” or “generator,” get clear on the variables that drive your setup:
- Your critical loads: what must stay on (fridge, lights, router, medical devices, phone charging, etc.)
- Runtime: how long you want to run those loads if power is out
- How you’ll operate it: hands-on DIY, semi-automatic, or “set and forget”
- Space and noise limits: garage vs. indoors, quiet neighborhood, apartment constraints
- Comfort with complexity: the simplest setup you’ll actually use beats the perfect setup you won’t
2) The basics (core actions)
Most “energy independence” starts with boring basics:
- Reduce waste where it’s easy
- Identify your must-haves (not everything)
- Build a basic backup plan you can expand over time
3) The next layer (the upgrade people skip)
Once the basics are handled, the next layer is where people usually make expensive mistakes:
- Choosing an approach that scales cleanly
- Avoiding unsafe wiring shortcuts
- Planning for real-life use (charging, storage, operation, and maintenance)
Example: Powering a refrigerator for short outages is different from powering a whole home for days.
Example: Charging phones/laptops is easy; heating/cooling is a different category entirely.
Next: let’s turn this into a beginner-friendly, step-by-step plan.
The Step-by-Step Plan (Beginner’s Guide)
This section is designed to help you make progress even if you’ve never built anything “energy-related” before. You don’t need to do everything this weekend—just move in order.
Step 1: Define your “keep life normal” list
A calm DIY energy setup starts with a simple question: What do I want to keep running when the grid isn’t cooperating?
Don’t start with “whole house.” Start with “minimum comfort.” Your list becomes the anchor for every decision later.
Checklist
- Write down 5–10 items you want powered in an outage
- Mark the top 3 as non-negotiable
- Note if anything is time-sensitive (fridge, freezer, internet for work)
- Decide whether you want backup only or also daily energy savings
- Identify where you’ll use power (kitchen, bedroom, garage, office)
Do this now: Make your non-negotiable top-3 list on paper before you research anything else.
Step 2: Estimate your power needs without getting technical
You don’t have to become an electrician, but you do need a rough idea of how much you’re trying to run.
Beginners often overestimate (and overspend) because they picture powering the whole home at once. You’ll get better results by thinking in “loads” and “runtime.”
Checklist
- Look up the wattage for your top-3 items (label, manual, or online spec)
- Estimate how many hours you want each to run
- Separate “always on” items (router) from “cycles” (fridge)
- Decide whether you need portable power (room-to-room)
- Write one sentence describing your goal (e.g., “Keep fridge + lights + phones going”)
Do this now: Create a simple list: item → watts → desired hours. Keep it rough.
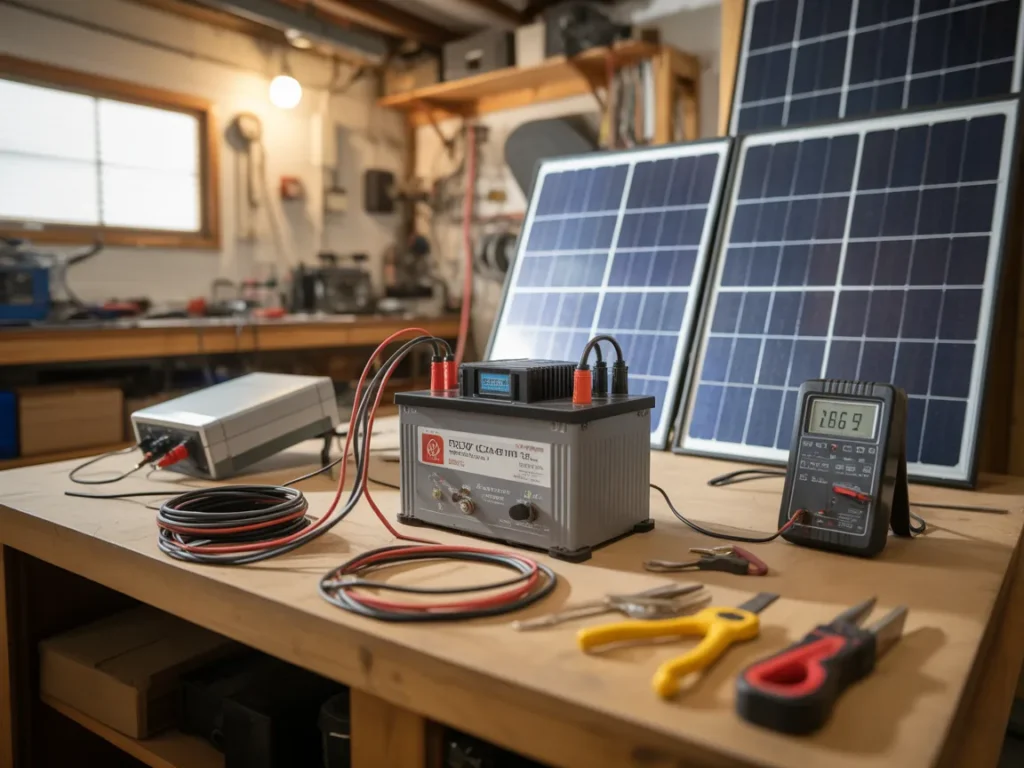
Step 3: Choose your baseline approach (portable, partial home, or deeper DIY)
Now you pick the “shape” of your setup. This is where most beginners get overwhelmed—because they skip straight to brands and components.
Instead, choose the category first. Then your decisions narrow naturally.
Checklist
- Pick your baseline: portable unit, generator-based, battery-based, or solar-assisted
- Decide whether you’re okay with manual operation (plugging things in)
- Note any constraints: noise, fuel storage, HOA, limited space
- Decide if you want something you can expand later
- Choose “simple first” over “ultimate”
Do this now: Choose one baseline approach and commit to it for your first build.
Step 4: Plan the safest way to connect and use power
“DIY” should never mean “guessing.” The real risk in home energy projects isn’t the idea—it’s unsafe connections and confusing operation in the moment you need it.
Your plan should answer: How will I actually use this on a random Tuesday night outage?
Checklist
- Decide what gets powered by direct plug-in vs. home circuits (if applicable)
- Choose a safe operating location (ventilation matters for certain options)
- Keep a written “startup/shutdown” routine
- Store cables/adapters together so you’re not hunting during an outage
- If anything touches home wiring, consider a qualified pro for that part
Do this now: Write a one-page “how I’ll use it” checklist and store it with your gear.
Step 5: Build in layers so you can upgrade without restarting
This is where the One Big Idea pays off: simple beats complicated. A layered approach helps you start small and expand only when you’ve proven you’ll use it.
Think of it like this:
- Layer 1: keep essentials running
- Layer 2: improve runtime and convenience
- Layer 3: expand capability (without chaos)
Checklist
- Start with the essentials you listed in Step 1
- Add capacity only after a real test run
- Keep your setup modular so you can expand
- Track what you actually used during an outage
- Set a reminder to check your system monthly
Do this now: Do a “practice outage” for 30–60 minutes and note what you wish you’d done differently.
Step 6 (Optional): Create a simple maintenance rhythm

Most backup power failures aren’t mysterious—they’re neglect. A small schedule keeps everything ready without turning this into a hobby you resent.
Checklist
- Inspect cables and connections monthly
- Keep your instructions updated as you change gear
- Store everything in one labeled bin or shelf
- Test your plan quarterly
- Replace/repair anything that looks worn
Do this now: Put a recurring reminder on your calendar: “Energy setup check.”
Next: the common mistakes that trap beginners (and how to avoid them).
Common Mistakes
Starting with equipment instead of a plan
Why it happens: Gear is tangible, and planning feels slow.
Simple fix: Define your top-3 loads and runtime first—then choose the category of solution.Trying to power everything
Why it happens: People imagine “whole home” as the only meaningful outcome.
Simple fix: Build around essentials; upgrade after you’ve tested real usage.Ignoring real-life operation
Why it happens: It’s easy to design on paper and forget the moment of use.
Simple fix: Write a one-page routine and do a practice run.Overcomplicating the first build
Why it happens: You want to “do it right” and get lost in specs.
Simple fix: Start with a baseline approach that’s easy to operate, then add layers.Not thinking about safe connections
Why it happens: DIY content online can skip safety details.
Simple fix: Stick to safe, intended use; if home wiring is involved, get qualified help.Skipping maintenance and testing
Why it happens: If it’s not used daily, it’s easy to forget.
Simple fix: Monthly checks and quarterly tests keep the system dependable.
Next: let’s compare your main options so you can choose calmly.
Options Comparison
Below are five common approaches people use when they want a DIY energy setup for home resilience and lower grid dependence. Each has a place—what matters is matching it to your needs and comfort level.
Option 1: Do nothing (status quo)
Best for: People who rarely experience outages and don’t mind full dependence on the grid.
Pros
- No learning curve
- No setup time
- No storage space needed
Cons
- No backup when power is out
- No control over price spikes or disruptions
Option 2: Portable battery power station for essentials
Best for: Homeowners who want quiet, simple backup for a few key devices.
Pros
- Beginner-friendly operation (plug in and go)
- Quiet and usable indoors (depending on unit and guidance)
- Easy to store and move room-to-room
Cons
- Limited runtime for larger loads
- You still need a plan for recharging
Option 3: Generator-based backup
Best for: People who need higher output quickly and are okay with fuel storage and noise.
Pros
- Can power larger loads depending on generator
- Familiar technology
- Useful for longer outages with fuel access
Cons
- Requires safe ventilation and careful operation
- Noise and maintenance considerations
- Fuel management adds complexity
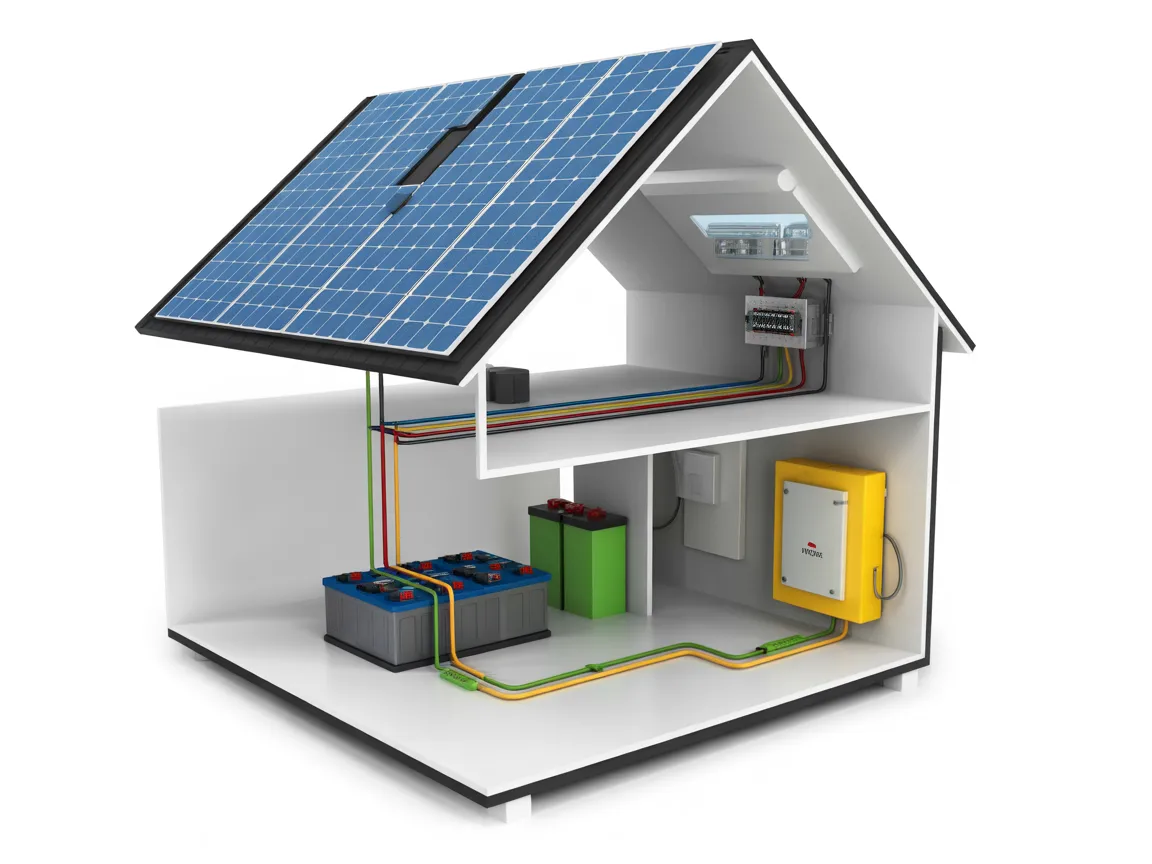
Option 4: DIY solar + battery (modular approach)
Best for: DIY enthusiasts and self-sufficiency seekers who want a setup that can scale.
Pros
- Potentially reduces dependence on fuel
- Modular expansions possible
- Encourages long-term resilience habits
Cons
- Planning and wiring decisions matter a lot
- More parts to understand and maintain
Option 5: Home electrical upgrades + efficiency-first approach
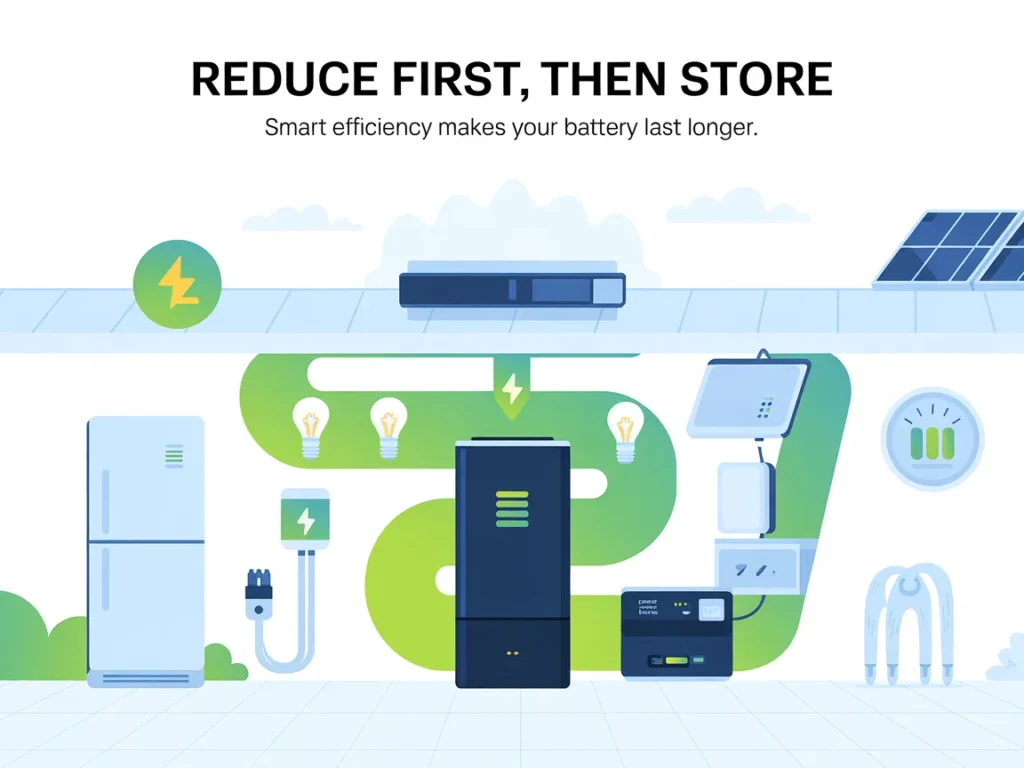
Best for: Homeowners who prefer improving demand first (so any backup option works better).
Pros
- Lower energy use helps any backup setup
- Can improve comfort year-round
- Reduces the “size” required for future backup
Cons
- Doesn’t create backup power by itself
- May require contractors depending on upgrade
Which option should you pick?
If you’re a homeowner who wants reliability without turning this into a full-time project, choose based on your constraints: time, budget comfort, and DIY confidence. Many beginners do best by starting with essentials-first (Option 2 or a simple version of Option 4), then expanding once they’ve tested real-life use. If you have frequent outages or higher power needs, Option 3 may fit—just prioritize safe operation.
Next: a helpful resource that walks through a DIY-focused energy approach in a more guided way.
Resources
If you like the idea of taking control with a DIY approach—but you don’t want to spend weeks piecing together scattered advice—there are step-by-step walkthroughs that can help you see the full picture in one place.
One that’s been making the rounds is the Energy Revolution System presentation. It’s positioned around a DIY-style energy setup, and it’s designed to show you the approach in a structured way rather than leaving you to guess your way through.
Even if you’re not sure it’s for you, the presentation can be useful as a “clarity pass” for beginners: you can see how the system is laid out, what it focuses on, and whether it matches your comfort level.
You’ll see how it works, what’s included, and whether it fits you.
In the presentation, you’ll see what this DIY approach looks like in practice
In Take Back Control: A DIY Energy Setup Explained for Beginners, the goal is clarity—so the next logical step is to watch a structured walkthrough and compare it to the plan you just built.
In the presentation, you’ll see:
- How the Energy Revolution System frames a DIY energy setup
- What the system includes (so you can judge if it’s genuinely beginner-friendly)
- The overall method the creator teaches, start to finish
FAQ
Beginner-friendly learning curve
If you’re new to DIY energy setups, a clear walkthrough matters. The goal is to follow a guided explanation instead of stitching together random tips.
Time required to get started
You can start with planning in one sitting and build in layers. The presentation format helps you quickly see the full approach without weeks of research.
Tools and special equipment
For most beginners, the first “tools” are a load list, a basic plan, and safe operating habits. Any deeper build decisions should be based on the method shown, not impulse buys.
Fit for homeowners
Yes—this topic is most relevant to homeowners managing outages, rising energy costs, and resilience. Your exact setup depends on what you want to keep powered.
Off-grid vs. grid-tied goals
You don’t have to go fully off-grid to benefit from a DIY energy plan. Many people start with backup power and expand only if it makes sense.
Safety and wiring concerns
If anything involves home wiring, it’s smart to be cautious and consult a qualified professional for that portion. A good system should emphasize clear, safe steps rather than risky shortcuts.
Avoiding overspending
The easiest way to avoid wasted money is to plan your loads and runtime first, then build in layers. A structured presentation can help you understand the order of decisions.
Whether you should watch even if you won’t buy
If you want clarity on how a DIY energy approach is organized, watching the presentation can still be useful. You can decide afterward whether it matches your needs.
Next: let’s lock in a simple action plan you can follow this week.
Mini Summary + Action Plan
Identify your top-3 essential loads (fridge, lights, communications)
Estimate rough wattage + desired hours so you’re not guessing
Pick a baseline approach that matches your home: portable, generator, battery, solar-assisted
Do a short practice outage to test your routine
Set a monthly check so your setup stays ready
Upgrade in layers: runtime first, complexity later
Keep it modular so you can expand without rebuilding from scratch
Simple beats complicated—especially when you’re building your first DIY energy setup.
Conclusion
If you’re serious about resilience and lower dependence on the grid, the fastest win isn’t buying something—it’s getting clear on a plan you can actually use. That’s the heart of Take Back Control: A DIY Energy Setup Explained for Beginners: start with essentials, make safe choices, and build in layers.
Picture the next outage: instead of scrambling, you already know what you’ll power, how you’ll run it, and what “good enough” looks like for your home. Calm, practical, and repeatable.
If you want to see a structured walkthrough of a DIY approach, the next step is simply to watch the Energy Revolution System presentation and judge whether the method fits your situation.
SEE THE FULL PRESENTATION HERE