
You know the moment.
You’ve measured, marked, and made the cut… and the board still ends up a hair short. Or the parts technically fit, but the whole build looks “almost right” instead of clean and square. Then you’re back at the lumber pile doing mental gymnastics, trying to salvage what’s left.
If you’ve ever felt like you’re buying extra wood “just in case,” you’re not alone—and it’s not because you’re bad at woodworking.
One Big Idea: Clarity beats confusion.
When your cut decisions are clear before you touch the saw, waste drops fast and your builds start coming together with less stress.
In this guide, you’ll learn:
- A simple framework for creating a cut list that actually matches real-world boards
- A step-by-step process to stop “almost right” builds before they start
- The most common cut list mistakes (and quick fixes that don’t require new tools)
Next: a quick reality check so you can see why this keeps happening—even to careful builders.
Quick Reality Check
Woodworking waste usually isn’t caused by one big mistake. It’s caused by lots of small “close enough” decisions stacked on top of each other—measurements, saw kerf, grain direction, and tiny layout choices that don’t show up until assembly.
It’s common to run into this when:
- You cut parts in the “right” lengths, but forget the kerf (blade width) adds up
- You build from a sketch, but don’t have a true cutting diagram for your plywood or boards
- You measure each part independently instead of planning rip cuts and crosscuts as a set
You’re not behind—you just need a simple plan.
Next: the core framework that makes a cut list feel obvious instead of overwhelming.
The Core Framework
A cut list that prevents “almost right” builds comes down to three layers. You don’t need fancy software. You need a repeatable thinking process.
What matters most (key variables)
These are the variables that quietly decide whether your material plan works:
- Final dimensions vs. rough dimensions (wood moves, edges aren’t always perfect)
- Kerf + clean-up allowance (you often need a little extra for trimming square)
- Grain direction and part orientation (especially on visible faces)
- Material thickness reality (nominal vs. actual, plywood variations)
When these are vague, your cut list becomes wishful thinking.
The basics (core actions)
The basics are the “unsexy” actions that prevent re-buying lumber:
- Define final part sizes clearly
- Add allowances intentionally
- Map parts onto boards/sheets before cutting
The next layer (the upgrade people skip)

This is what separates smooth builds from constant do-overs:
- Creating a repeatable system you can use for any project
- Keeping cut notes so your next build gets easier
- Building from detailed plans so you’re not inventing joinery mid-project
Example: A cabinet build looks correct on paper, but if you don’t account for saw kerf across multiple shelves, your last shelf suddenly doesn’t fit your sheet goods plan.
Example: A small table looks simple, but if you don’t plan for clean-up passes (jointing/planing/squaring), “exact” cuts turn into “short” cuts.
Next: a beginner-friendly checklist guide you can follow on your next project.
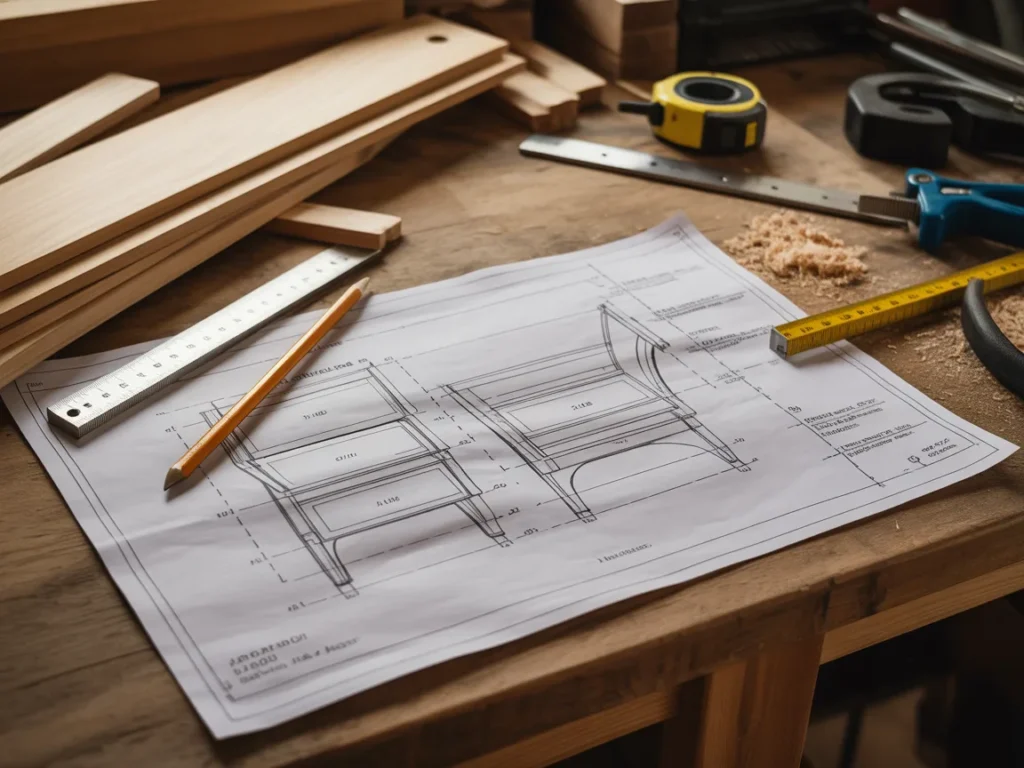
The Step-by-Step Plan
This is a Checklist Guide approach—simple, repeatable, and friendly to small workshops.
Step 1: Define the “final size” of every part first
Before you touch lumber, get clear on what each piece must be when finished—after sanding, squaring, and fitting. This is where many “almost right” builds start: the cut list is based on rough guesses instead of final requirements.
If you’re building from memory, a napkin sketch, or a photo online, pause. A clean cut list starts with clear, final dimensions.
Checklist
- Write down every part: legs, aprons, shelves, rails, panels, trims
- Record final length, width, and thickness for each part
- Separate “structural parts” from “cosmetic parts”
- Note which faces/edges must be clean (visible surfaces)
- Mark any parts that must match (left/right pairs)
Do this now: Open a notes page and list every single part before thinking about boards.
Step 2: Add the allowances you’ll actually need (on purpose)
Woodworking reality: you rarely go from rough board to perfect part in one cut. Even if you’re using pre-surfaced lumber, you’ll often need trimming, squaring, or fitting.
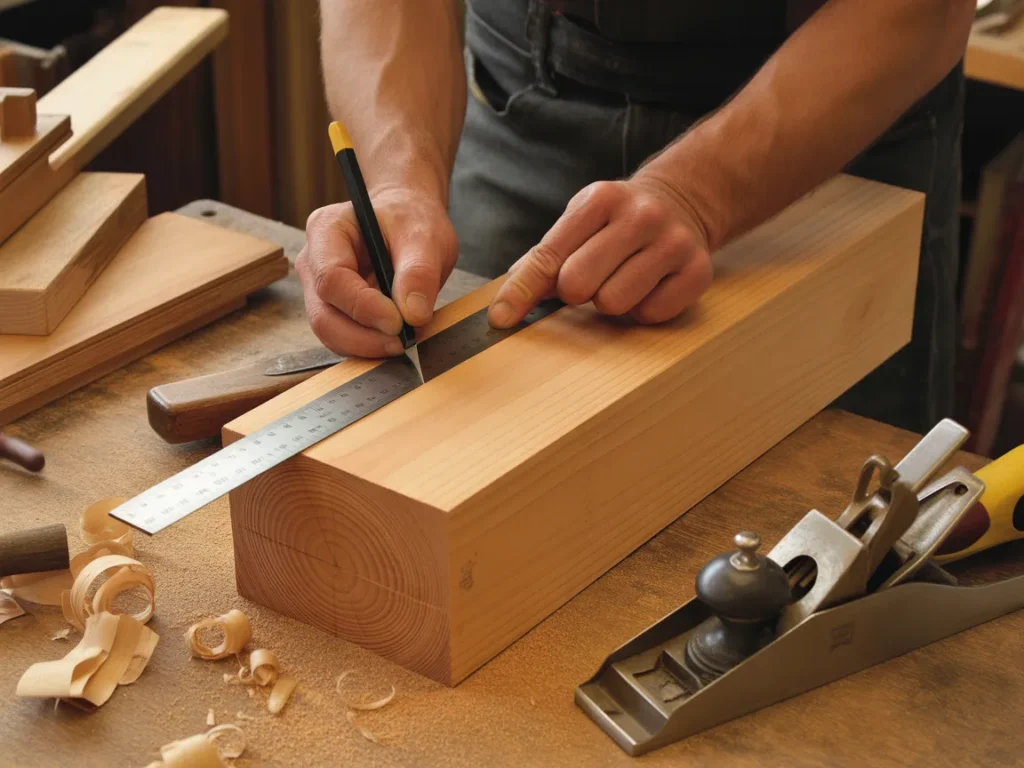
This step is how you stop coming up short.
Checklist
- Account for saw kerf across repeated cuts
- Add trim allowance for squaring ends (especially for long parts)
- Add a little margin for sanding/cleanup on visible parts
- Note where you’ll cut “oversize then trim to final”
- Flag any parts where grain direction matters (to avoid re-cutting)
Do this now: Choose which parts you’ll cut slightly long/wide first, then trim to final size.
Step 3: Make a simple cutting order (so you don’t box yourself in)
A cut list isn’t just a list—it’s an order of operations. If you cut the small pieces first, you can ruin your ability to get clean long rips. If you cut without thinking about layout, you create awkward offcuts you can’t use.
The goal is to plan your cuts so the wood “cooperates.”
Checklist
- Decide which cuts happen first: rips vs. crosscuts
- Group parts by thickness and material type
- Plan to break down large sheet goods safely before fine cuts
- Keep matching parts together (pairs, shelves, rails)
- Identify “must not mess up” show faces and protect them
Do this now: Pick one project and write a 5-line cut order: breakdown → rip → crosscut → trim → fit.
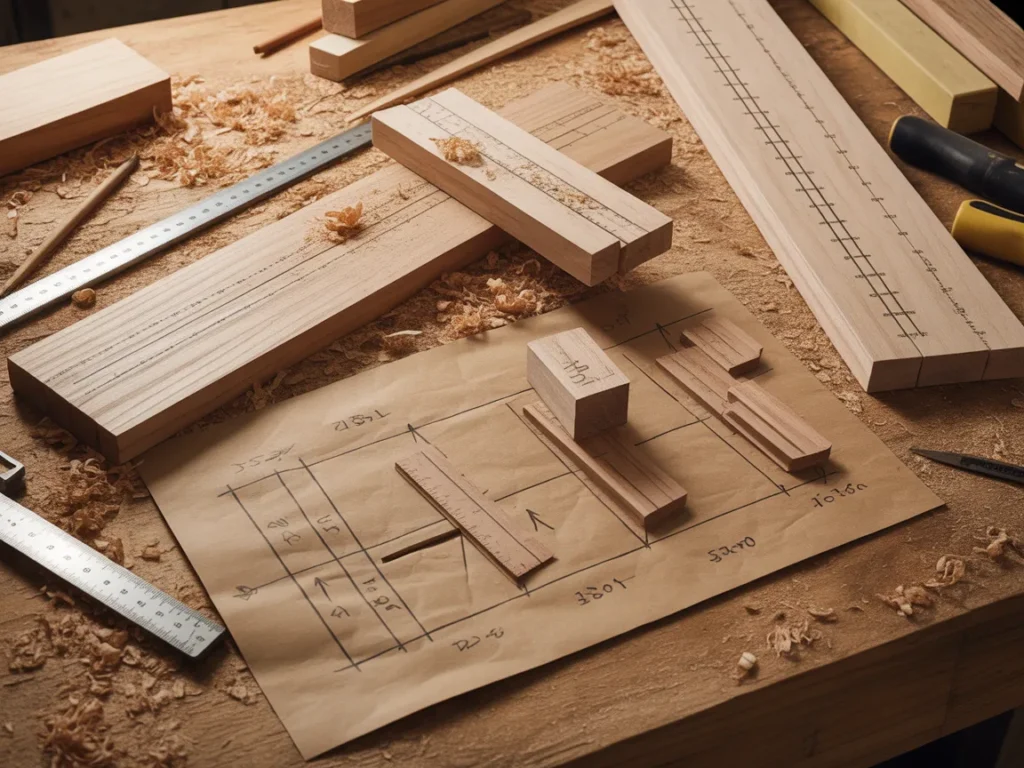
Step 4: Map parts onto your actual boards or plywood sheets
This is where waste drops fast.
Instead of asking, “Do I have enough wood?” you’re asking, “How will these parts come out of this exact sheet or these exact boards?” That’s a different mindset—and it’s what prevents last-minute rebuys.
If you’ve been relying on mental layout, this step will feel like a relief.
Checklist
- Measure your real stock (don’t assume advertised size is perfect)
- Sketch a quick layout for plywood to create a cutting diagram
- Arrange parts with grain direction/appearance in mind
- Keep similar parts together to reduce setup changes
- Leave room for kerf between cuts and trimming passes
Do this now: Grab a sheet of paper and sketch a rough cutting diagram before your next plywood cut.
Step 5: Label everything and track what you cut
A cut list system fails when parts become “mystery boards.” Labeling sounds basic, but it prevents mix-ups that lead to bad fits, swapped lengths, and re-cuts.
This also helps if you stop mid-project and come back later.
Checklist
- Label each part as soon as it’s cut (pencil is fine)
- Mark orientation: top/bottom, left/right, show face
- Bundle matching parts together
- Check parts off the cut list as they’re completed
- Keep offcuts organized by usable size
Do this now: Label your next three parts immediately after the cut—before setting them down.
Step 6 (optional): Build from detailed plans when the project has more moving parts
Some builds are simple; some quietly get complex—especially furniture builds, cabinets, and anything with multiple shelves/doors/drawers.
A detailed plan can reduce decision fatigue because it shows you the parts, the sizes, and how the project is meant to go together.
Checklist
- Use plans that include clear part dimensions and diagrams
- Prefer plans with multiple project types (so you can reuse the system)
- Keep printed pages in the shop for quick referencing
- Follow a consistent build sequence
- Make notes on what you’d change next time
Do this now: For your next “bigger” build, commit to using a plan instead of improvising joinery midstream.
Next: the mistakes that keep creating “almost right” builds—even for careful DIYers.
Common Mistakes
Mistake 1: Treating the cut list like a shopping list
Why it happens: It’s easy to list lengths and think you’re done. But without layout and order, you still waste material.
Simple fix: Add a basic cutting order and a rough layout for boards/sheets.
Mistake 2: Ignoring kerf when multiplying cuts
Why it happens: One cut feels negligible—until you make 12 of them.
Simple fix: When parts repeat, assume kerf adds up and leave room between parts in the layout.
Mistake 3: Cutting to final size too early
Why it happens: Final dimensions feel “precise,” so it seems right to cut exact immediately.
Simple fix: Cut slightly oversize for key parts, then trim square to final after fitting.
Mistake 4: Measuring every part separately instead of referencing a master
Why it happens: It feels accurate to measure each piece fresh.
Simple fix: Use a stop block or reference a master part so pairs actually match.
Mistake 5: Not planning for show faces and grain direction
Why it happens: You’re focused on dimensions and forget the visual flow.
Simple fix: Mark show faces and orient parts on the layout before cutting.
Mistake 6: Letting offcuts become a chaotic pile
Why it happens: Offcuts feel like clutter—until you need one.
Simple fix: Sort offcuts into a few size categories so you can quickly “shop the scraps” first.
Next: a neutral comparison so you can choose the approach that fits your time, tools, and style.
Options Comparison
Option 1: Mental cut planning (no written cut list)
Best for: Very small, forgiving projects (simple shop fixtures, quick repairs)
Pros
- Fast to start
- No paperwork
- Works when tolerances don’t matter much
Cons
- Easy to forget kerf and allowances
- Higher waste on sheet goods
- Hard to resume the project later
Option 2: Handwritten cut list + simple sketch
Best for: Woodworking beginners and DIY enthusiasts building weekend projects
Pros
- Clearer than memory
- Helps track parts and progress
- Easy to customize per project
Cons
- Layout can still be inefficient without a cutting diagram
- Mistakes happen if measurements aren’t standardized
Option 3: Spreadsheet-based cut lists
Best for: Hobbyists who like organizing and repeating builds
Pros
- Easy to duplicate and edit
- Helps with material estimates
- Good for repeatable parts
Cons
- Doesn’t automatically solve layout or grain direction
- Can feel “desk-heavy” vs. shop-friendly
Option 4: Cut list / cutting diagram software
Best for: Furniture builders doing frequent sheet-good projects
Pros
- Can improve cutting efficiency
- Helps visualize yield from plywood
- Reduces some math errors
Cons
- Learning curve
- Still depends on good inputs (final sizes, allowances)
Option 5: Building from detailed woodworking plans
Best for: Self-taught builders who want less guesswork and clearer build flow
Pros
- Clear part dimensions and diagrams
- Helps prevent “inventing it as you go”
- Can speed up decision-making on complex builds
Cons
- Plans vary in quality
- You still need to measure and cut carefully
Which option should you pick?
If you’re a DIY Enthusiast, the best choice is usually the one that reduces guesswork without adding friction. For quick builds, a handwritten cut list and sketch may be enough. If you’re doing furniture, cabinets, or anything with lots of repeated parts, detailed plans (and a consistent cut list system) can save time and material—especially when your shop time is limited and you want fewer “redo” cuts.
Next: a simple resource that can make the “detailed plan + clear cut list” approach easier to follow.
Simple Resource
If you like the idea of reducing wood waste by building from clearer cut decisions, it helps to see what a complete plan system looks like—especially one that shows part dimensions and how projects go together.
One resource many woodworkers explore is Ted’s Woodworking. The presentation walks through what’s included and how the plans are meant to be used.
Even if you don’t end up using it, it can be useful to watch/read the presentation just to see a structured way to approach builds—so your cut list isn’t guesswork.
You’ll see how it works, what’s included, and whether it fits you.
SEE THE FULL PRESENTATION HERE
In the presentation, you’ll see:
- A walkthrough of the Ted’s Woodworking plans system and how it’s organized
- The variety of woodworking project plans included
- How the plans are designed to help you build projects with clearer steps and structure
FAQ
Fit and skill level
Is this beginner-friendly for DIY Enthusiasts who are still learning basics?
It’s presented as a structured set of woodworking plans, which can be easier to follow than improvising from scratch.
Do I need special tools to benefit from a cut list system approach?
A cut list workflow can be done with basic measuring and cutting tools; the key is planning and consistency.
Time and overwhelm
I don’t have much shop time—will this make projects slower?
Planning takes a little time up front, but it often prevents re-cuts and mid-build stalls that cost more time later.
I get overwhelmed by lots of steps—how do I keep it simple?
Stick to the basics: final dimensions, allowances, a rough cutting diagram, and labeling parts as you cut.
Materials and waste
Can The Woodworking Cut List System: How to Stop Wasting Lumber on “Almost Right” Builds work with plywood and sheet goods?
Yes—sheet goods are where cut planning and cutting diagrams can make a noticeable difference.
What if my boards aren’t perfectly straight or consistent thickness?
That’s normal; build your cut list from real measurements and leave room for squaring and cleanup.
Project selection
What kinds of projects does this approach help most with?
Anything with multiple parts—shelves, cabinets, tables, storage builds, and furniture—where small errors stack up.
Do I have to commit to anything right away after watching the presentation?
No—you can simply review what’s included and decide whether it fits your style and projects.
Next: a clean recap you can save and use on your next build.
Mini Summary + Action Plan
Write final dimensions for every part before touching lumber
Add kerf and cleanup allowances intentionally
Decide a cutting order (breakdown → rip → crosscut → trim → fit)
Keep parts organized with labels and orientation marks
Track your progress by checking off parts as they’re cut
Upgrade with cutting diagrams for plywood and sheet goods
For complex builds, use detailed plans so your cut list doesn’t rely on guesswork
Clarity beats confusion—especially before the first cut.
Conclusion
If you take only one thing from The Woodworking Cut List System: How to Stop Wasting Lumber on “Almost Right” Builds, let it be this: when you plan the cuts clearly ahead of time, the build stops feeling like constant correction.
Picture your next project with parts labeled, lengths matching, and your plywood layout already mapped—so you’re not “hoping” you’ll have enough material halfway through. You’re just following a clear sequence.
If you want to see what a structured plan library looks like—and how the projects are laid out step-by-step—watch/read the presentation and decide if it matches how you like to build.
SEE THE FULL PRESENTATION HERE